Making Your Own Herbal Tea
This post may contain affiliate links. View our disclosure policy here.
Making your own herbal tea is fairly easy and can actually be pretty fun! While there’s a variety of herbal tea blends available for purchase, they are not always suited for your personal needs and tastes. In addition, many may contain artificial ingredients or flavorings that are damaging to your health and negate the benefits of the herbs.
Making your own blend allows you to not only know exactly what’s in your cup of tea, but lets you customize the tea blend to best suit your needs, your tastes, and can save you money when you buy the herbs you work with in bulk. It only takes just a few basic tools and ingredients in your wellness basket. Then WOW! A cup of deliciousness helps you on your wellness journey!
Tools, Equipment and Ingredients
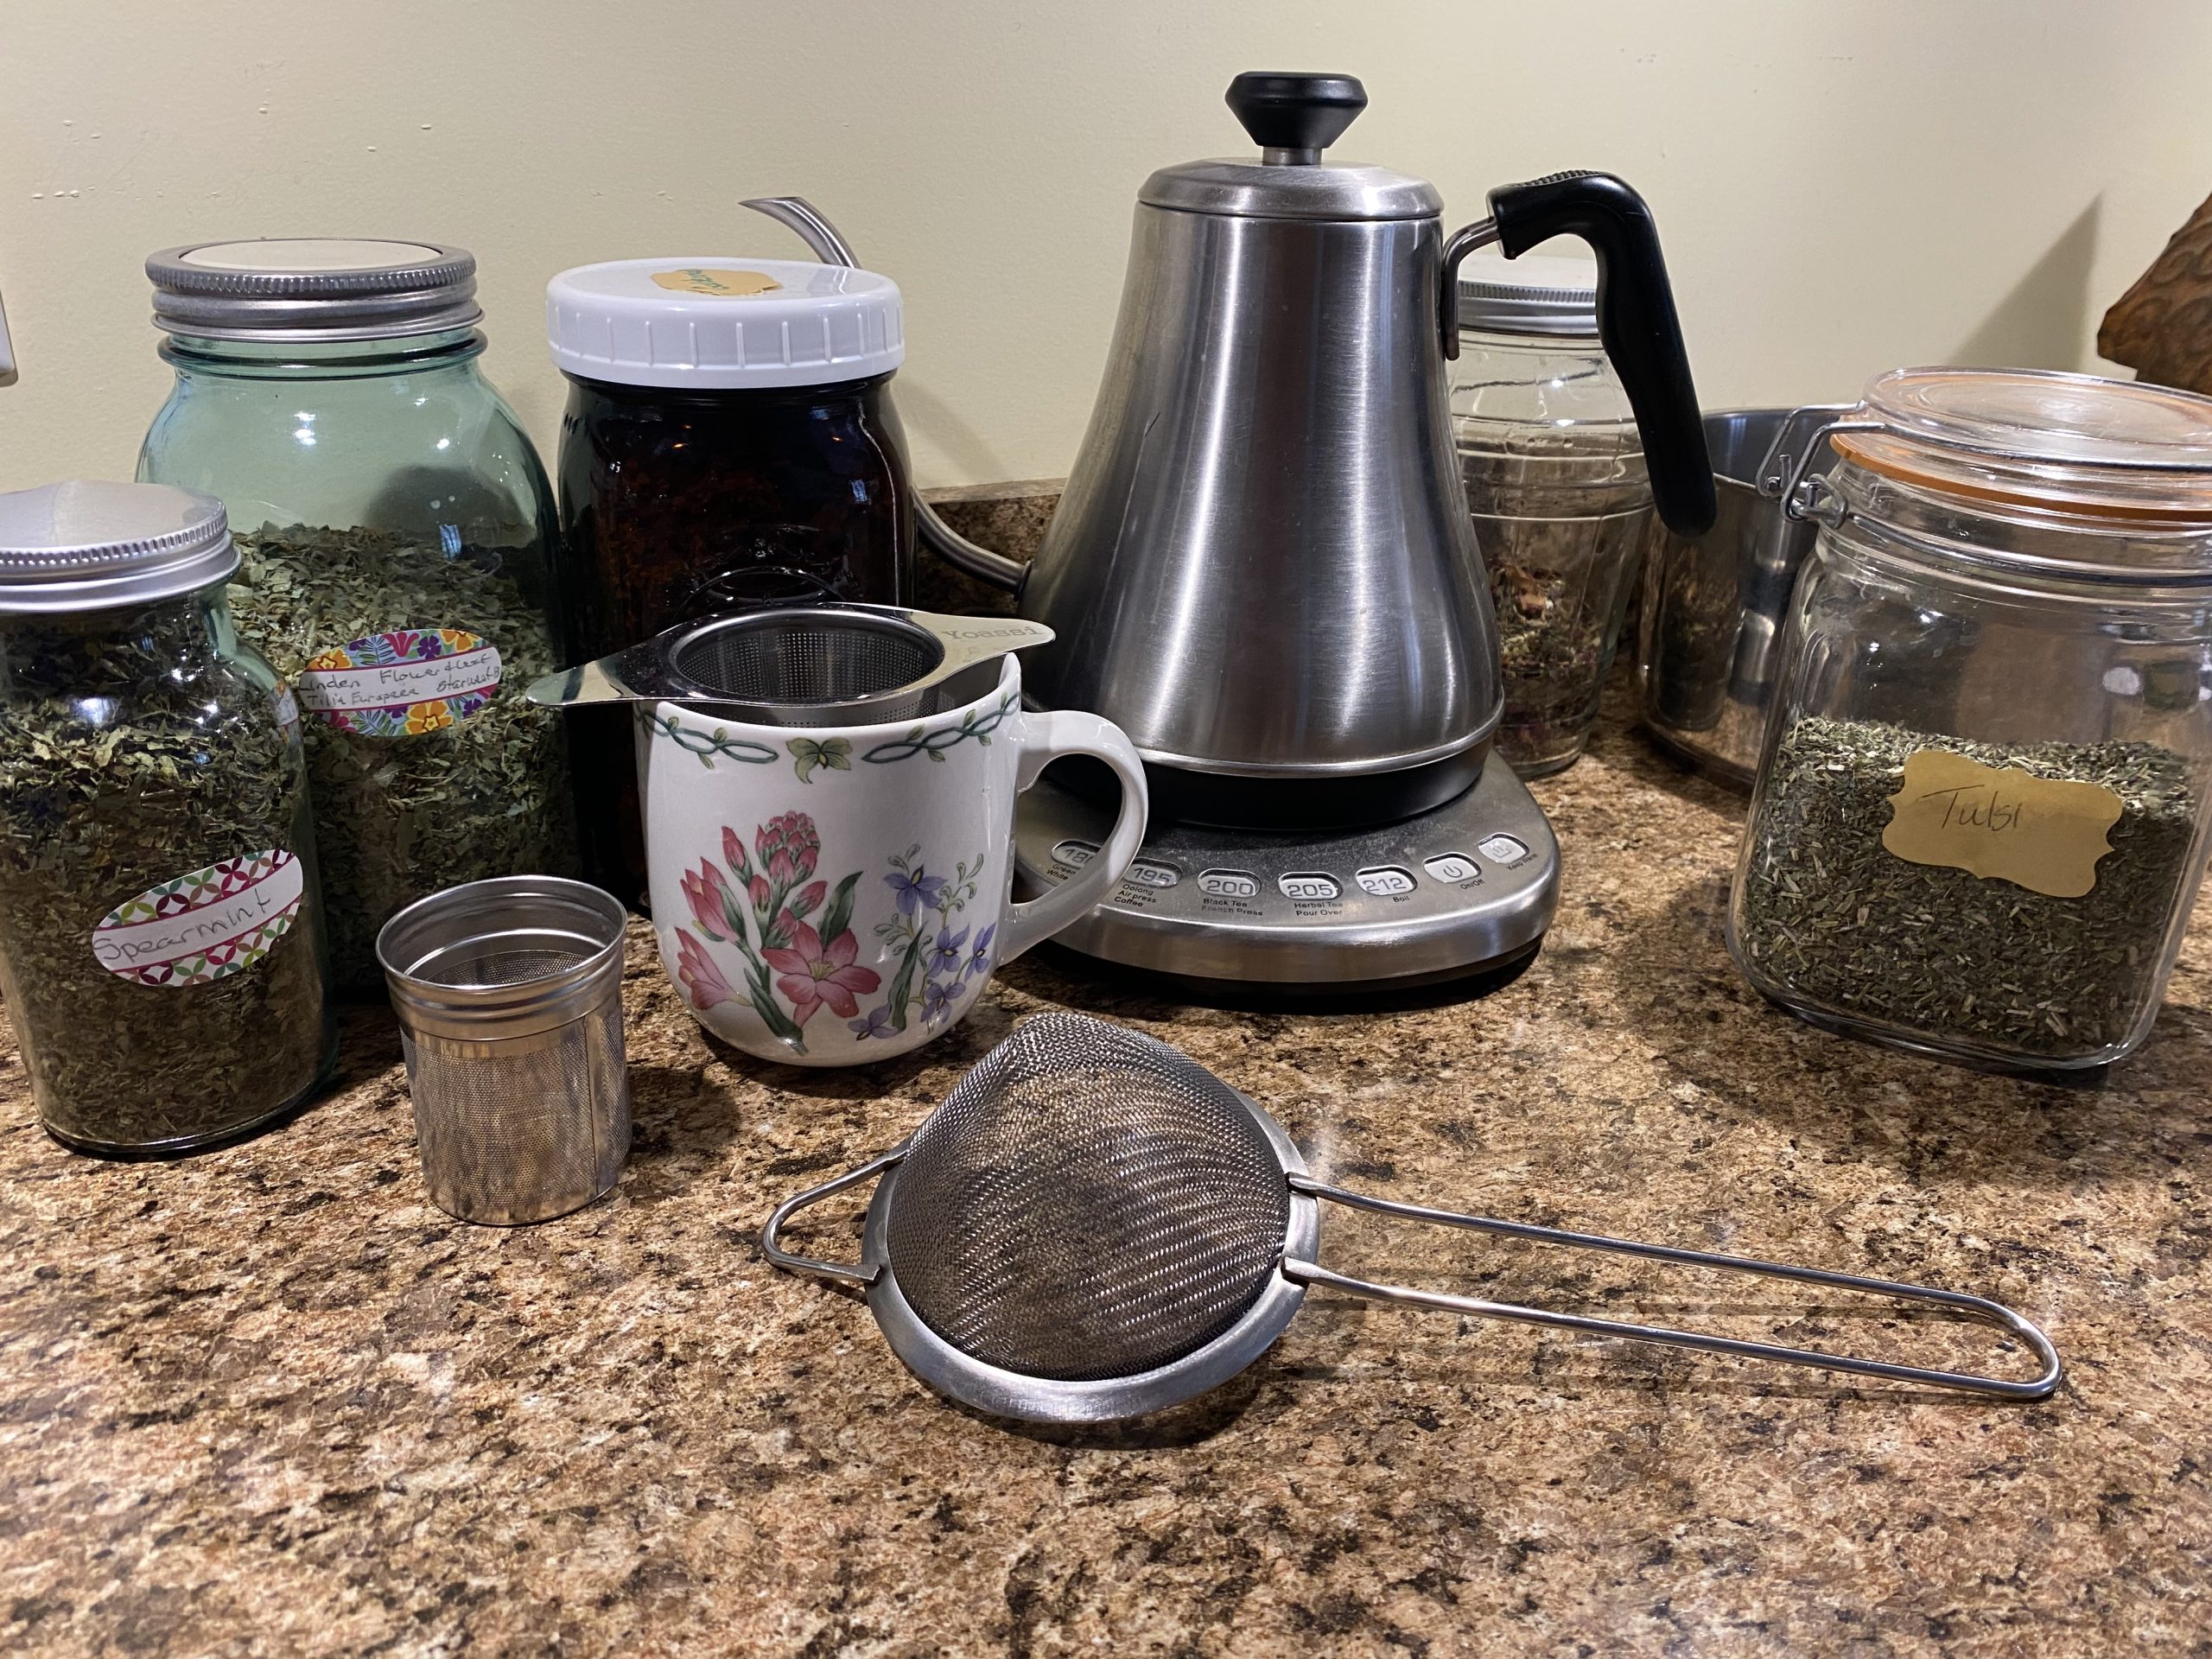
To get started you need some basic tools and equipment. Don’t worry, it doesn’t take anything fancy. Most of what you need is probably already in your kitchen. If not, it won’t be hard to find.
Herbs
Naturally the most important thing you need is herbs! It’s delightful to have some fresh herbs right out of your own garden but if you don’t- no worries! There’s many places to purchase quality, organic dried herbs. My favorites are Mountain Rose Herbs and Foster Botanicals. But I do occasionally purchase various herbs from Amazon. The companies I order the most from through Amazon are Starwest Botanicals and FGO.
The herbs you choose are going to be up to you. I’d suggest starting with a few that are familiar to you. If you are not sure where to start, read some of the herb of the month posts to get some ideas! Check out Tulsi, Lemon Balm, and the post on Chamomile.
Tea Kettle
A Tea Kettle, Pot or whatever you like to boil water in. Really any pot will do. I like to use stainless steel. I also have this nice goose neck electric tea kettle that boils a nice amount of water for me fairly quickly. When I make a LOT of tea at once, I use it and a stainless steel pot on the stovetop.
Pot With Lid
This is only necessary if you are making a decoction with roots or woody like parts of an herb. See the section on decoctions below. When I’m making a large amount of tea in the morning for my entire family though, I do use a lot of pots to save time (instead of bringing my one tea pot to boil 3 or 4 times). I use stainless steel pots and pans because aluminum can be toxic. Don’t nourish with toxins! Here’s a basic 2 quart stock pot with a lid on Amazon.
French Press Pot
This is NOT necessary but a delight to have. A press pot could be less steps in making the tea as the press pot can strain the herbs for you. Simply place the herbs in the bottom of the pot, add water, and pour when ready. Here’s a nice one that may work well, make several cups at a time, and really easy to strain the herbs.
Mason Jars
Mason jars are perfect for making tea because they are heat-resistant and you can pour your boiling water right in them. Just be sure they really are mason jars (made for canning) or the glass may break from the hot water. I have a variety of mason jars not just for making my tea, but also for storing my herbs!
Strainers
I like to keep various types of strainers around. What I choose to use depends on the container I’m steeping my tea in or how much I’m making at one time. Here’s some links to a few of the types I have and use often:
Cone Shaped Strainer – I use these for big batches of tea. I sometimes put a big handful of herbs in a larger mason jar and use this strainer to strain the tea into a smaller cup or glass later after it’s steeped.
Double Handled Tea Infuser – These are my current favorites. The brand doesn’t matter so much here as the style. It rests nicely on a mug or mason jar and is zero mess. Simply drain and dumb the herbs in the compost! They are a finer sift than the messy balls that never seem to close properly and leave herbs floating in the tea.
How To Make the Perfect Herbal Tea
It won’t take you long browsing here on My Wellness Basket to see that teas are my favorite way to work with herbs. Not that you won’t hear me talk about tinctures, supplements and maybe even a few beauty products, but I rarely go a day without herbal tea. When drinking daily, teas can be a wonderfully effective way to work with herbs medicinally, especially for long-term or chronic imbalances.
Making Your Own Herbal Tea Blends
The first step is collecting the herbs you want to work with and deciding on a blend. I will continue talking about individual herbs each month in further detail (See Herb of the Month: Tulsi) for an example! In the meantime, my favorite book to help you get started is written by the instructors at CommonWealth Herbs and gives wonderful information on 35 medicinal herbs and how to work with them. If you are familar with a few favorite herbs, experiment a little with those, combining 2 or 3 at a time, coming up with your own variations.
Infusions
Making your own herbal tea allows you to choose not just the blend, but how you make it as well. When you imagine the perfect cup of tea, you most likely think of what’s called an infusion. Another method is called a decoction and we’ll talk about that briefly below. They are both relatively simple. First let’s talk hot, cold, and long infusions.
Infusions are usually made from leaves, flowers, and aromatic parts of the plant (not the roots or bark).
Hot Infusions
For a hot infusion, simply bring the amount of water that you desire to boil.
On average, I like about 1 mug of water (about 8-10 oz.) for every tablespoon of herbs. If you are using teabags, the amounts of herbs in them are really less than minimal for medicinal purposes and I always use two of them! For lose herbs, I just measure by sight- what looks like a good amount to me but it’s generally about a tablespoon for each cup or so.
I pour the water over the herbs and allow to steep, covered (especially if aromatic herbs), for anywhere from ten minutes to an hour or more. The time really depends on the herb, taste, and effects I want. See ‘Why Different Steeping Times below’!
Cold Infusions
Cold infusions are perfect for demulcent or mucilaginous herbs. Marshmallow is a great example. A cold infusion is ideal for aromatic plants whose volatile constituents might be damaged by too much heat. Additionally, some plant constituents are better extracted at room temperature to bring out the most benefits. Selecting a few fresh herbs from the garden and placing them in water to steep in the natural sunshine is also one example of a cold infusion.
Long Infusions
When your purpose is the extraction of mineral content or the high nutrients of herbs such as nettle or red clover, a long infusion is glorious. The mineral content is amazing when you allow your nutritive herbs to sit for 4-5 hours or overnight! This is what I like to do with my Nettle and Friends blend which is a recipe I got, again, from my coursework at Commonwealth Herbs. Check out their recipe here. I’ve played around with this recipe quite a bit myself. Not necessarily ‘loving’ the earthiness of the original recipe, I’ve adapted it to find one that works for me. And HERE IT IS:
- 1 Part Nettle
- 2 Parts Red Clover
- 1 Part Dandelion Leaf
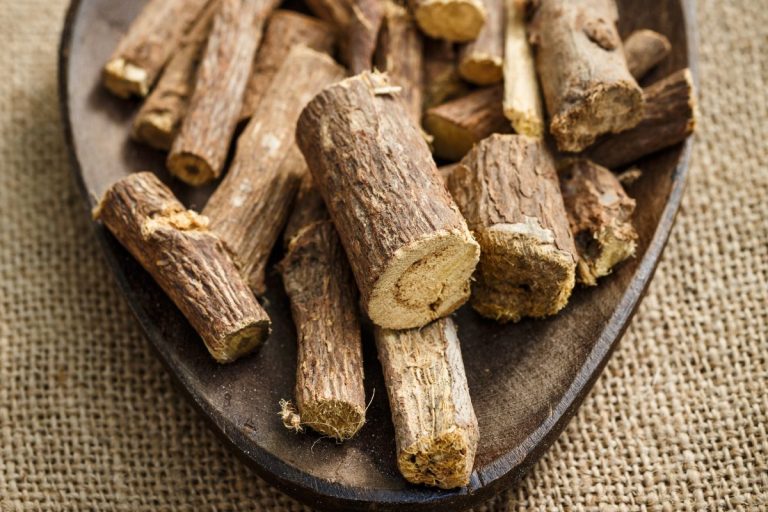
- 1/3 Part Licorice Root
- 1 Part Spearmint (gives lovely flavor!)
- * I simply blend all of this together in a REALLY BIG jar…about 64 oz- so I don’t have to mix it each night when I work with this blend almost nightly- especially in early spring and the weeks leading up to it as a wonderful way to prevent seasonal allergy reactions – nettle is good for that! Then I take a big handful or so in the evening (just before bedtime) and place it in a 16-32 oz mason jar- about an inch of herbs at the bottom. Pour my hot water over the herbs, filling the jar, and allowing it to sit and steep overnight. In the morning I use my cone shaped strainer over a glass and fill it up. This is the first thing I drink in the morning. I drink about half and then sip on the rest here and there through the day.
Decoctions
Decoctions are generally used for herbs that are tougher such as roots and barks. Seeds or other hard, woody like plant parts are best made in decoctions as well. Their toughness requires more time in the hot water to release their medicinal benefits.
Generally, 2-4 Tbsp. of herbs (roots, etc.) are added to a quart of water. Put the herbs and water together in your stainless steel or ceramic pot (please no aluminum), cover, and bring to a boil. After the water has come to boil, reduce heat and simmer for about 20 minutes, up to one hour, stirring every so often. Strain the liquid and enjoy your decoction!
Decoctions do take more time to make than an infusion but are really not difficult at all. It’s also true that because of the length of time and the herbs generally used in decoctions, they are not always as pleasant tasting. As you experiment, you may want to infuse some more pleasant tasting herbs and mix the two teas together for your final product.
Why Different Steeping Times?
Each herb is different. So are my tastes and yours. And sometimes, the medicinal benefit we’re seeking is different too.
Start out with 1 tbsp. per cup of water for your infusions and steep for ten minutes. See how it tastes. If it’s a bitter herb, you may want to add stevia leaf, honey, or another natural sweetener of choice.
When you make your next infusion with the same herb, make it with a little less or a little more herb and steep it for 20 minutes or 30. Experiment to get a good sense of the flavor. Notice how it feels on your tongue as you taste and swallow. Also know that the more of the herb you put into the drink and the longer it steeps, the stronger the brew- and often the stronger medicinal effect. Read more about the herbs you work with to know more about this effect!
What Herbs Are Best to Mix Together for Tea?
It’s fun to exeriment when making your own herbal tea! Incidentally, this is going to be different for each person and maybe even according to the day or season. In early spring, I make my nettle infusion as mentioned above, but I also have other blends through the day. If I’m really stressed, I make sure I’m adding several nervines to my blends or adaptogens.
When I’m feeling under the weather or I’ve had exposure to someone who is sick during cold and flu season, I’m going to work with immune building herbs such as Angelica, Astragalus, Calendula, Elder, Echinacea, Garlic, Lemon, Pine, Reishi, Self-Heal, Thyme, Tulsi, etc.
If I’m aiming to improve my eyesight, herbs of choice would be Bilberry and Gingko. If I’m working on sleep then I may reach for Ashwagandha, Catnip, Chamomile, Passionflower, or Skullcap.
So each blend is going to depend on what I’m trying to accomplish in addition to what I like. When making your own herbal tea, you get a lot of benefits. You can select what you need and what you LIKE. For any blend I like to add at least one herb I love the taste of : Lemon Balm, Rose, Spearmint, etc.
Homemade Tea Recipes
Still not sure where to start? Well, here’s a few simple recipes, not calling for many herbs, to get your started!
Tulsi & Lemon Balm
This is a really nice and easy blend to start with! Pleasant tasting and great for daily use.
- 1-2 teaspoons tulsi
- 1-2 teaspoons lemon balm
- pour 8-10 oz of hot water over these herbs and allow to steep (covered) for ten minutes or more, according to taste and effects desired.
Simply Lemon and Ginger
Here’s an easy one that you may already have the ingredients for, or can easily obtain, even if you don’t have an ‘herb’ collection. This is perfect for cold and flu season 0r anytime!
- 1 lemon (juice a lemon or use 1-2 tblsp lemon juice)
- lemon peel (optional but it gives lovely flavor)
- honey
- ginger (optional) – I use about a quarter of an inch of ginger, cut up in small pieces, or more.
- pour 8-10 oz. of hot water over these herbs and allow to steep (covered) for ten minutes or more, according to taste and effects desired.
Pine Needle Tea
I thought I’d drop this one on here for fun so you can really start thinking outside the box if you don’t have a big herb supply. You might have a white pine tree nearby! White Pine is actually quite high in vitamin c content!
- 1 handful of fresh, right off the tree, white pine needles
- orange or lemon peel, grated
- honey (optional)
- 2 cups of water
- Make this as a ‘short’ decoction. First, put the pine, citrus peel, and water in a small pot and place on the stove on high heat. Bring to a boil and a then allow to simmer for 5 minutes. Remove from heat and allow to cool in pot for an additional ten minutes. Lastly, add honey to taste.
Good For My Heart Tea
- 1 teaspoon Linden
- 1 tsp Hawthorn Leaf
- 1 teaspoon Hawthorn Berries
- 2 teaspoon Lemon Balm
- honey (optional)
- pour 8-10 oz. of hot water over these herbs and allow to steep (covered) for ten minutes or more, according to taste and effects desired.
Tips For Making Herbal Tea
- Always make a cup of the single herb by itself and drink without sweeteners! This is the only way you know for sure what flavor (and personal affect) the tea has for creating blends that you love and work for you.
2. Always write down the recipe you create! Even if you don’t like the tea you ended up with, you now have a base to work with. You can figure out what you want less or more of. Keep your notes to compare your recipes for more tweaking later!
3. Label everything! (I’ve learned the hard way) When your teas arrive, especially if they are in plastic, place them into jars and label them with their common name, Latin name, and place and date of purchase. Store them in a darkened area for best storage.
4. Keep your recipes simple in the beginning. Try to work with just 2-3 herbs at a time or go with recipes that others have created and then tweak them to your liking.
5. Begin with what’s easy and abundant. Try to start with the herbs in your own garden (or a neighbor’s garden- with permission of course!) or you can find locally if possible. At the very least, purchase what’s largely available and common. There’s no need to work with hard to get, at risk or endangered plants. There’s many herbs available with similar effects.
6. Learn about your herbs. Keep reading the herb of the month posts here on My Wellness Basket and find some other sources to keep learning more. There’s some great free video channels on YouTube that keep me company while making dinner quite often!
7. Work with QUALITY herbs. Buy organic if you can so that you are not nourishing your body with pesticides and other toxins that defeats the purpose of what you are doing. If it means you can only afford a few less costly herbs than some of the herbs that tend to be costly, that’s okay. Work with what’s affordable but also of a good quality. Mountain Rose Herbs is one company that I completely trust. Another company that I recently tried is called Herbco.com.
I hope you are excited about adding more herbs to your life! They are really so amazing! Let me know if you have any questions and please let me know what herbs you are working with!
You May Be Interested In These Posts!
The Amazing Benefits of Chamomile Tea
Please remember I am not a doctor or holistic practitioner. My blog is for educational purposes only. Please see my disclaimer page.


This is a very educational post with lots of good herbal tea recipes.
Have fun trying them out!